How to build your own video platform with live streaming and WebRTC using Sequel
Building unique live, interactive audio and video experiences is becoming more and more important, however, having to build a video experience like Zoom – that takes years to design, develop and manage. You could use other API providers like Agora or Vonage but you still need to build the whole experience from scratch including the mute button, screen sharing, networking, live streaming to social, etc – that is difficult and expensive
This is where we come in Our APIs provide the right abstractions so your engineering team does not need to start from scratch and get to market in one month (the average time it took our customers). Our pre-built components allow you to get started in 5 minutes and come with incredible features that can be completely customized for your platform. We split them in two components that can cover any possible use case, in this article we will focus on the Virtual Stage:
- Virtual Stage – for webinar type experiences
- Networking Hub – for attendee interaction and connection building
Virtual Stage Component
- Up to 100 users onstage in a WebRTC experience <100ms latency and HD quality
- Up to 2 million concurrent viewers
- Instant on-demand after a session is over
- Compatible with all web browsers with no loss of quality
- Production studio for queuing presenters, sharing video content, switching between views, enabling lower thirds, overlays and attendee promotion
- Built-in chat with attendee/presenter chat, private chat, polls, q&a
- Ability to switch to networking before, during or after any session
- Support for RTMP-in and live streaming to any social platform or custom RTMP
- Support for virtual backgrounds
- Minute by minute tracking of user engagement
In this article, we will focus on how to create, embed and go live using our Virtual Stage component. At the end you will learn how to easily build a community website with live sessions, on-demand videos and networking capabilities. Let’s get started!

Creating a developer account
Before we get started, make sure you create a free developer account on our platform, no credit card needed. Yes, we are totally free to get started: https://admin.sequel.io/sign-up
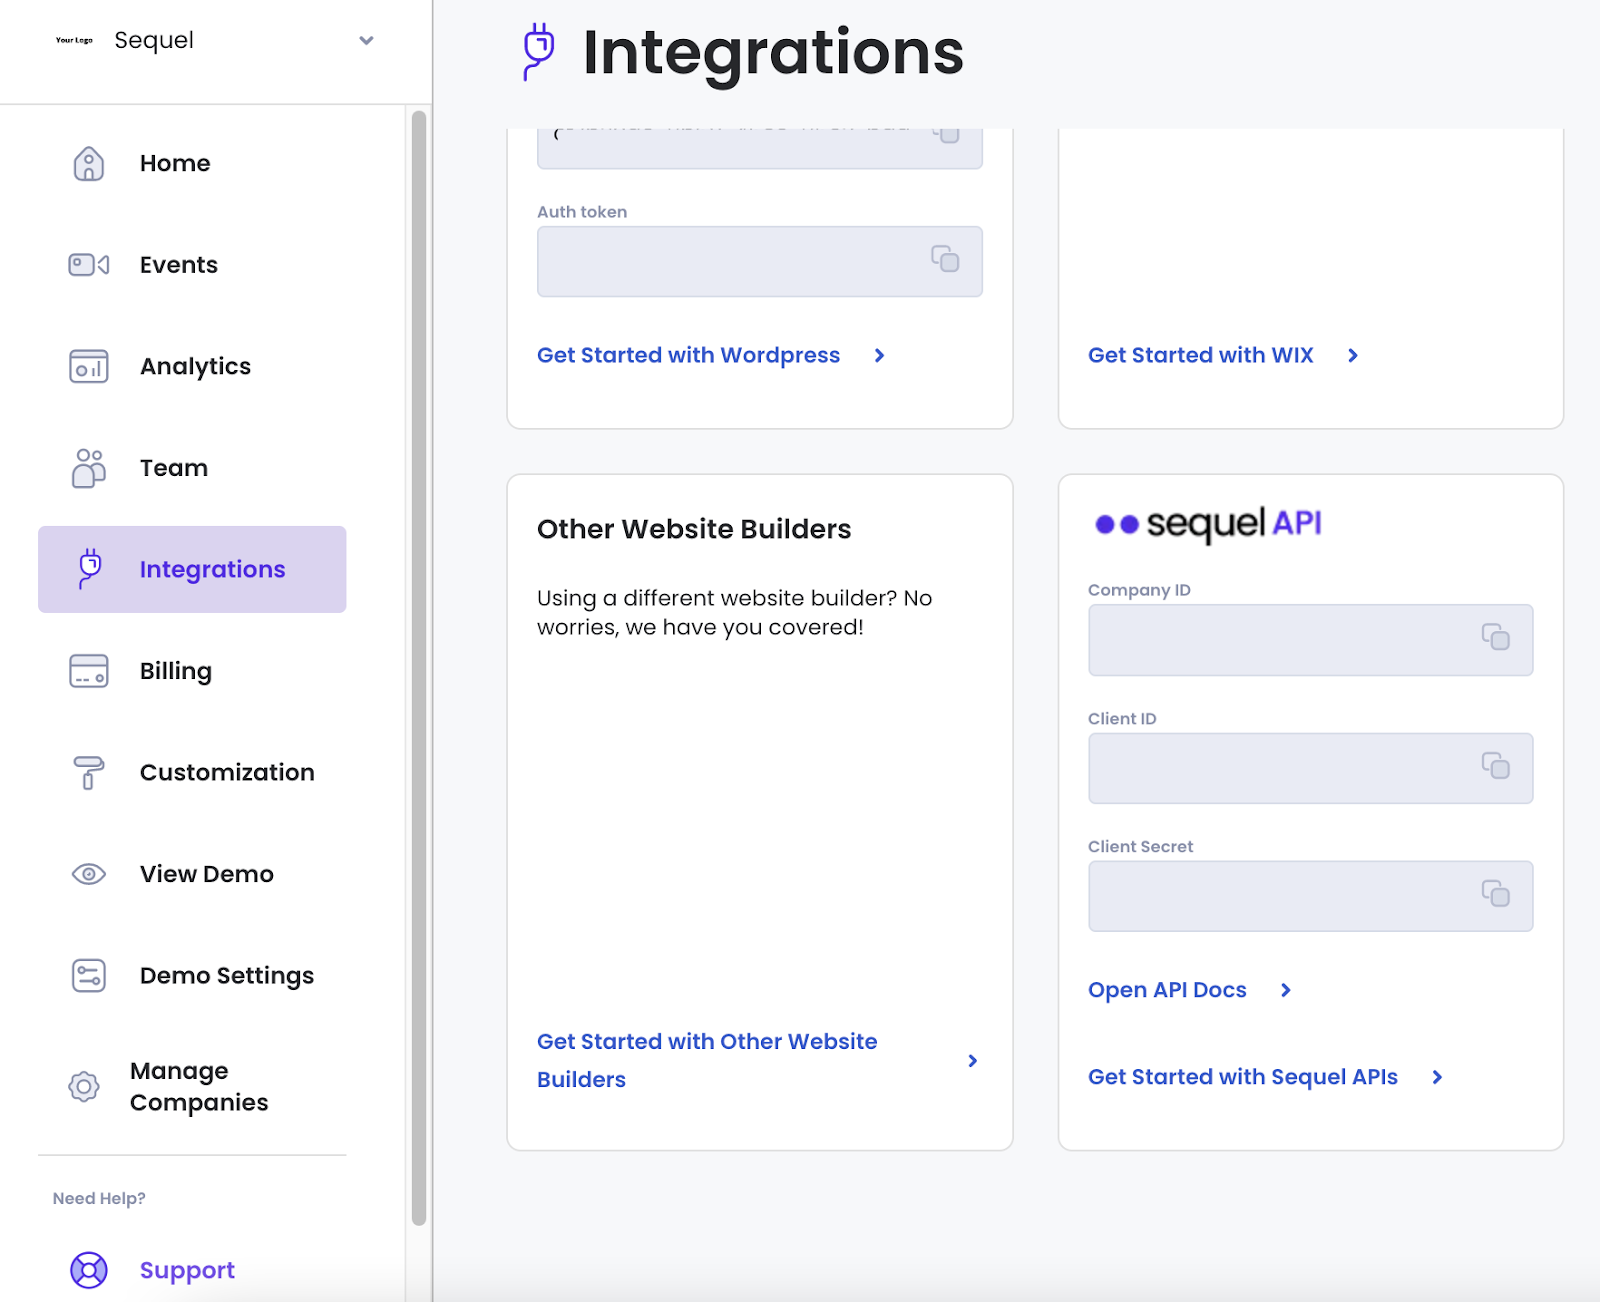
Once the account is created, you can access the client ID and secret needed for authentication. This can be found in the “Integrations” tab under “Sequel API”
Fetching the JWT token
Sequel APIs are protected using JWT access tokens, so the first step is to fetch an auth token using the following details. Use the client ID and secret from the step above:
- Execute a POST call to https://api.introvoke.com/api/oauth/token
- Set the header to content-type: application/json
- Add a JSON body with the following
Here is an example cURL:
Example response
Please note the token will expire in one day so we recommend refreshing the token at least once every 24 hours.
Creating a session
Now that you have a token, you can automate the creation, editing and customization of any live session on Sequel. With the free developer account you will notice you already have a session created. To create another session you can use the admin dashboard or the API calls. The process is explained in our docs here: https://docs.introvoke.com/reference/addevent
- Execute a POST call to https://api.introvoke.com/api/v1/event/create
- Set the header to content-type: application/json
- Add a JSON body with the following:
- “companyId“: This can be found next to the CLIENT_ID and CLIENT_SECRET
- “Name“: The name of the event you wish to create
- “startDate”: This is the start date of the session in UTC, our component will provide a countdown for attendees to know when it starts
- “endDate”: The end date of the session in UTC. We do not force the end date and the live session can continue even after but it’s useful for analytics
- “timezone”: Timezones taken from https://www.npmjs.com/package/timezone-support. We will automatically adjust the session start date/time depending on the user timezone
- “Organizers“: Array that holds the email of hosts.
Embedding a session
This is the fun part, every session that you create can be embedded directly in your platform. Before we continue it is important to understand the different user permissions that are available for each component. We expose 3 different user permissions:
- Host – this user is the host of the session. They can go backstage, go live, switch views, lower-thirds, promote users, block users, delete chat messages and switch to networking. They have all the power in the session and should be granted only to very specific users.
- Presenter – this user is presenting at the session but does not have moderation ability. They can turn on the microphone/camera, they can go onstage and present but they cannot go live, moderate any chat activity or switch modes.
- Attendee – this is the default permission for all users, they can interact with the chat but they cannot turn on camera/audio unless promoted by the host or if networking is enabled.
Depending if you have authentication built-in, you can pass the user information to us or, you can use our registration and access codes to identify users and grant the above permissions.
Use existing authentication
For most platforms you already have an existing authentication so our components can seamlessly login users for the best experience. To achieve this, you need to call the Embed Code API: https://docs.introvoke.com/reference/getembedeventbyid
This endpoint requires a few fields to identify the user, all of these are required:
- userId – field to uniquely identify the user. We recommend passing your existing user id into this field. This could also contain the email or any values that will help you identify them in analytics.
- userName – field to display the name of the user
- userEmail – field to keep track of the user email. This is purely for analytics purposes to understand user engagement in the component.
- userAvatar – field to assign an avatar to the user. This can be blank to revert to gravatar.
The post call will return a unique url for this user to join the session. The next step is to simply add the url in an iFrame:
That’s it! The session will now contain the user information that was passed in the API call and it’s ready to be used. The default permission level is attendee and if you wish to elevate the permission to host, you can add the userId or userEmail in the organizers fields. This can be done at event creation or by using the update event API.
Use Sequel user authentication
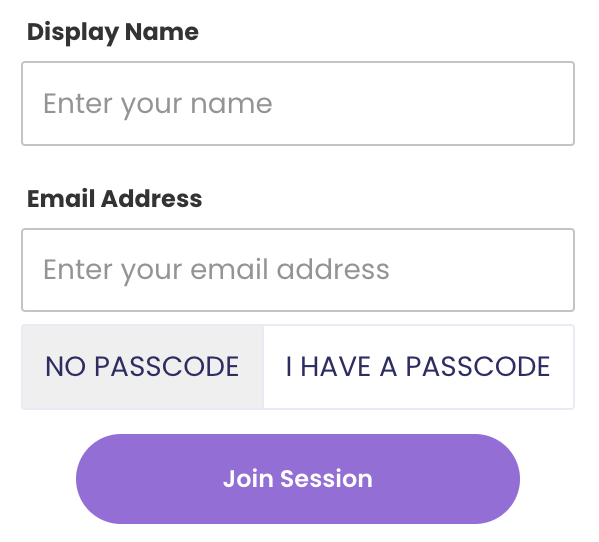
If you do not have authentication already built or you are looking to allow anonymous users to join a session, you can use the pre-built registration and access code authorization.
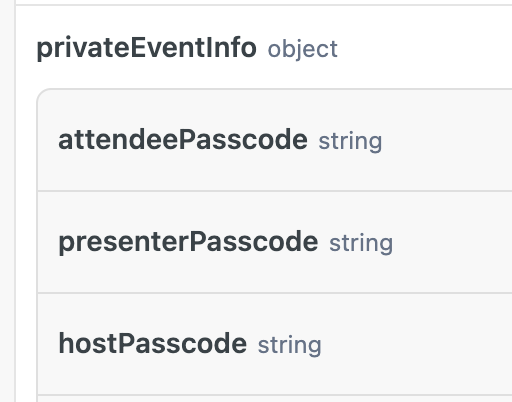
By default, sessions will be restricted and require the unique code generated using the Embed Code API. To enable our auth you can simply set the isRegistrationModeEnabled flag to true. This can be done at event creation or by updating the event with this API call. Please note the passcodes returned by the API, these can be used to elevate the permission level of users. For example you should share the host passcode only to users that need to be hosts in that session.
By default, sessions are open to all users. If you wish to restrict access we recommend looking at using your own authentication as this is the most secure approach or setting the flag isAttendeeRegistrationModeEnabled to true. This will require users to enter the attendee passcode above to join the session giving you control over who gets to join.
To embed this session, you can simply add the eventId at the end of this url and add it to an iFrame:
Going live
Once your session is embedded, you can start interacting with the virtual stage. The next step is to ensure you are joining as a host. Depending on the steps above, you either need to set your email address in the organizers field or to use the host passcode to join the session.
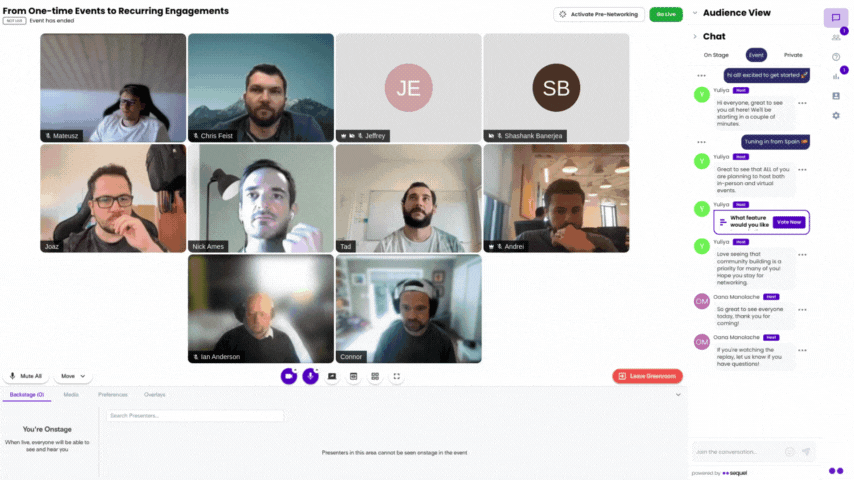
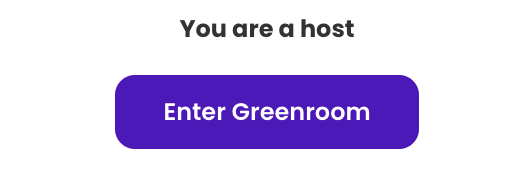
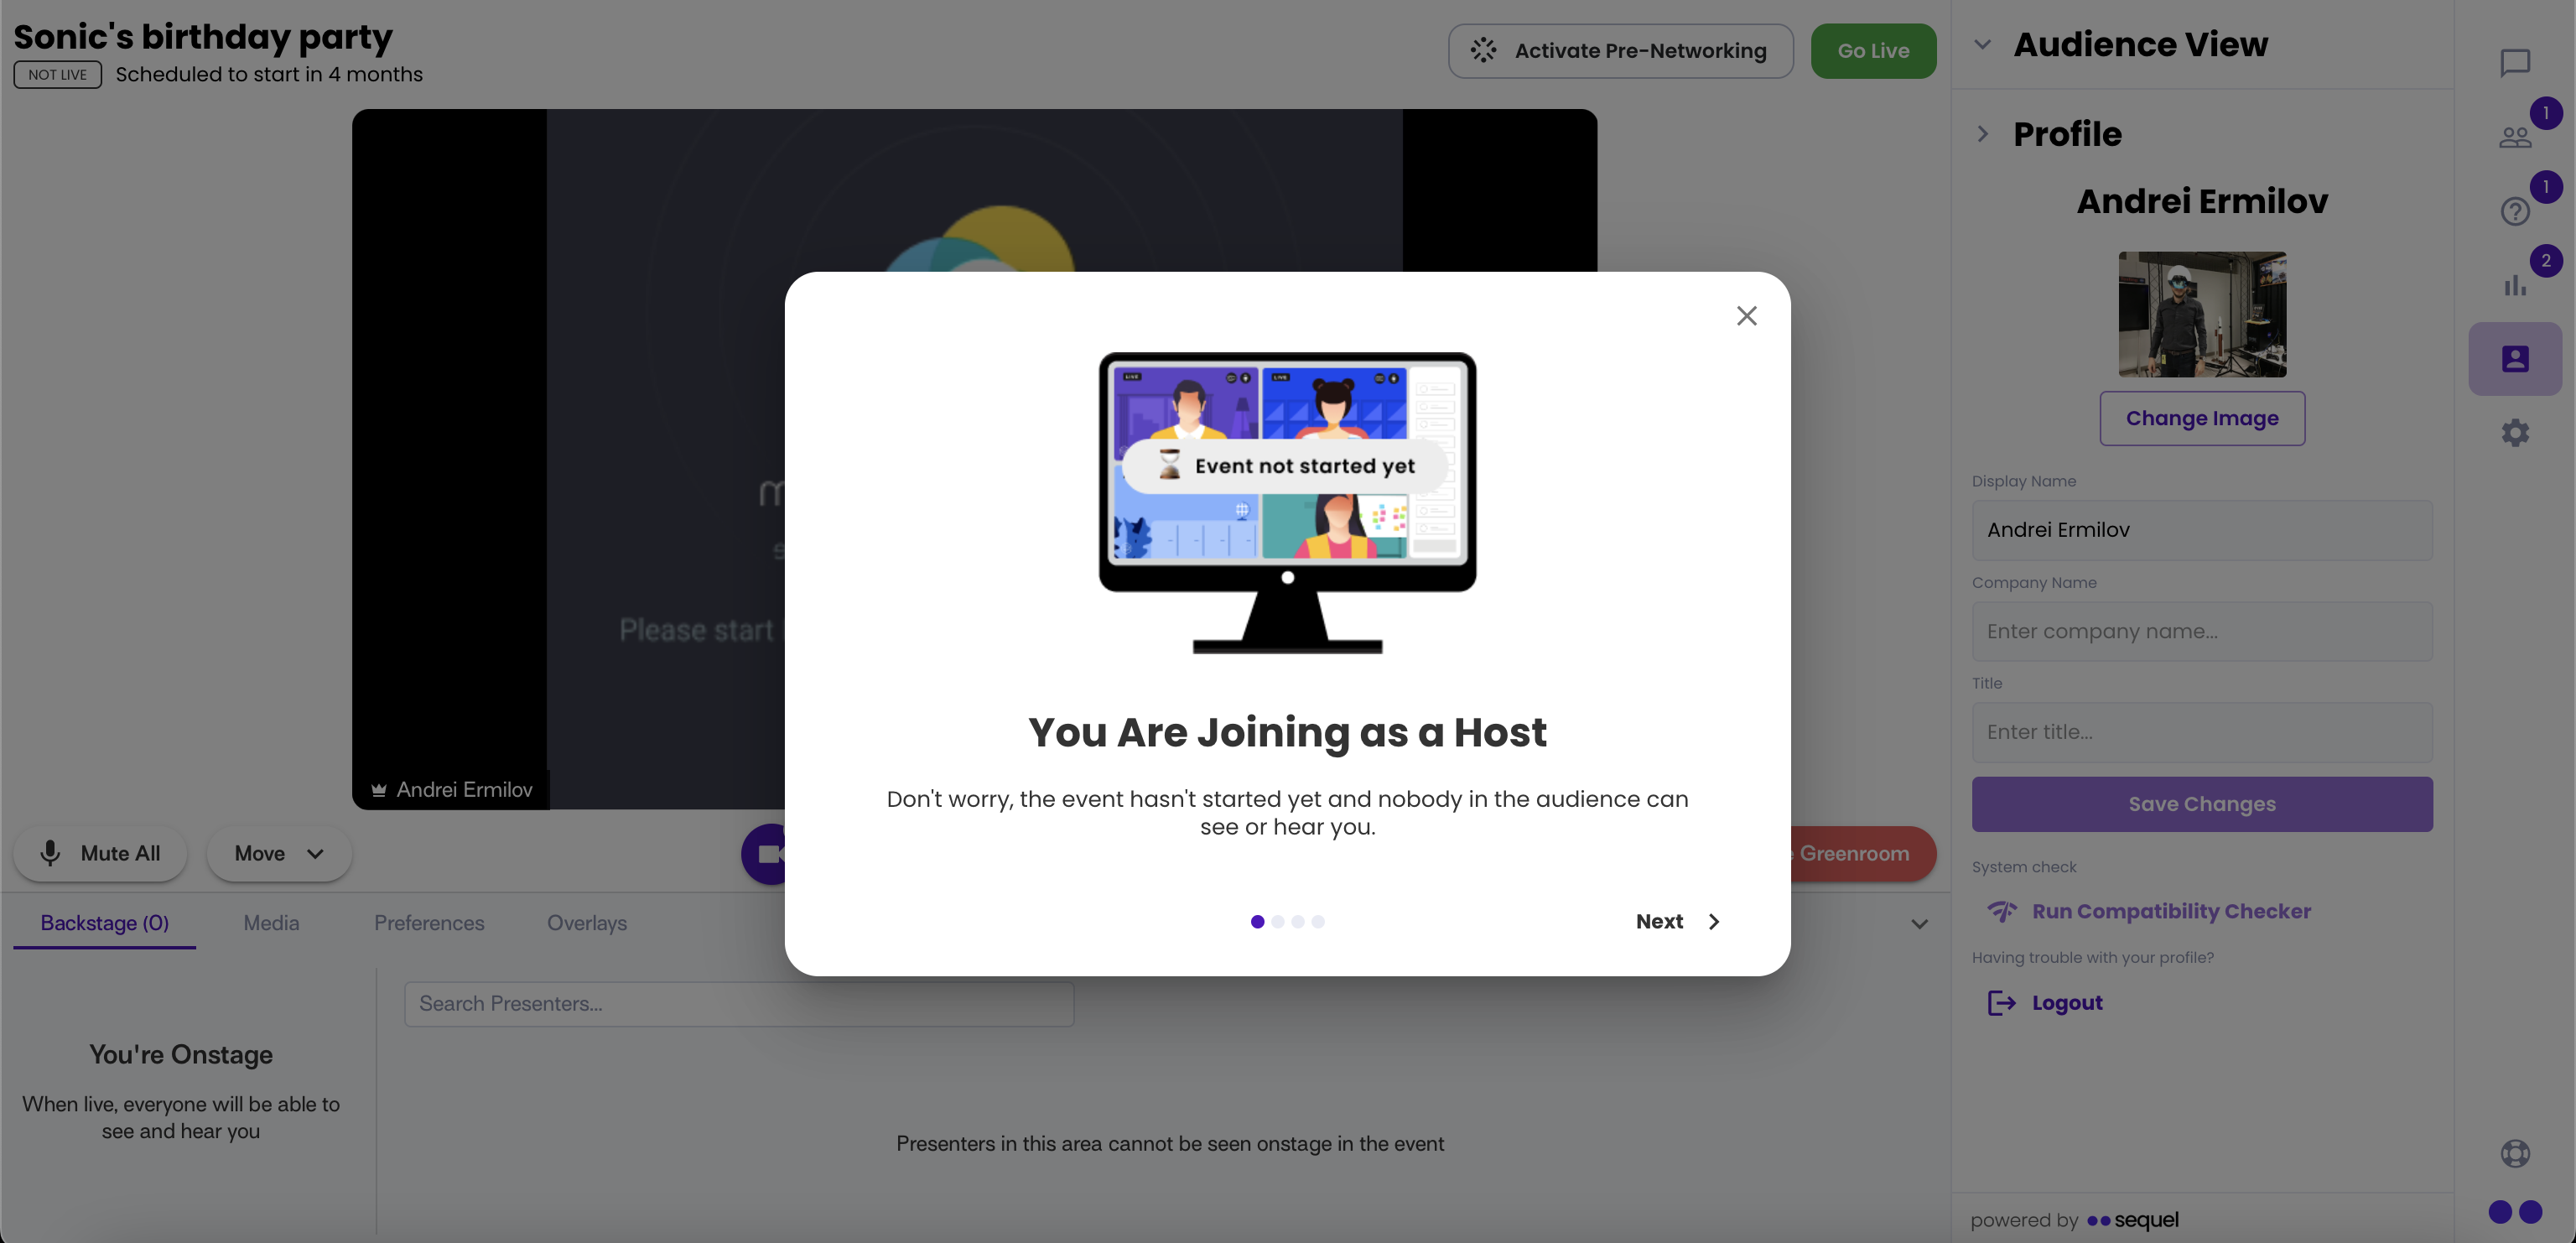
Once the right permission is granted you will see a message under the countdown “You are a host”. Press the “Enter Greenroom” button and you will enter the virtual experience. This is a full-blown production studio, the interaction is done in a proprietary WebRTC experience with <100ms latency between presenters in any region in the world.
We know… there are a lot of features here so take your time experimenting and bringing your team for testing. Once ready, you can press the Go Live button at the top right and the audience will be able to see you.
What is behind the scenes
You might find our approach different but by keeping the experience in an iFrame with complete customization, you can take advantage of a user experience that takes years to design, plan and develop. The UI in our components has extensive user research and validation to ensure the best possible experience for all users, especially hosts that need to manage many things at once. With our complete customization options you can choose to enable/disable any feature from our components and make this match any scenario or platform. Stay tuned for more blog posts on how to customize the components.
The underlying video/audio technology is also built by our team on top of WebRTC and it comes with all of the features you’re used to from Twilio and Agora, plus so much more:
- We support global scale with 16 data centers and a historical 99.99% uptime
- Automatic switching between p2p and SFU with a smooth transition
- 100 people on screen and up to 2M participants with HD quality as standard
- Individual optimized bandwidth management for audio, video, screen sharing, and media sharing
- SFU based architecture with optimized UI and codecs to reduce CPU load
- Automatic connection handling when devices switch between WiFi and cellular
- HD+ quality for real-time interaction (up to 1080p)
- Full-HD and 4K support for RTMP and pre-recorded content
- Screen sharing quality to match any screen size
Building a community platform
Now that you understand how our platform works, you can take these API endpoints and create a simple community website where users can attend live sessions, go live and network with each other. To achieve this, simply download our quick starter GitHub repo, add your client ID and secret and you can see how easy it is to add live video:
https://github.com/introvoke/sequel-react-quickstart
This sample shows how you could use your own authentication, how to fetch upcoming events and hook up the embedCode api. The email of the user is hardcoded here:
Make sure to add this email to your events in the Organizers field to give yourself the host ability. You can then go live and experience the full capabilities. Give it a try and let us know if you have any questions in our API discussion group.
Looking for more advanced cases? Do you want to have source code access to the components? Our customers created full-blown virtual events platforms, networking websites, webinar platforms and much more. Reach out to us at support@sequel.io and we can discuss any scenario.